Quick Description
This High-Protein Chocolate Ice Cream is the perfect healthy indulgence, rich in chocolate flavor but packed with protein. Made with cottage cheese or Greek yogurt, this creamy dessert is sweetened with a natural sweetener like honey or maple syrup and loaded with chocolate protein powder. It’s perfect for those who want to enjoy a guilt-free treat while meeting their protein goals. Whether you’re following a high-protein, low-sugar, or keto diet, this ice cream will hit the spot without the guilt!
Servings & Timing
Servings: 4–6 servings
Prep Time: 5 minutes
Freezing Time: 4–6 hours
Total Time: 4–6 hours (mostly freezing)
Ingredients List
- 2 cups cottage cheese (or Greek yogurt for a lighter texture)
- ¼ cup cocoa powder (unsweetened)
- 2 scoops chocolate protein powder (around 30g–40g, depending on your protein powder brand)
- 3 tbsp honey or maple syrup (adjust sweetness to taste)
- 1 tsp vanilla extract
- ¼ cup milk of choice (almond, oat, or dairy milk) – adjust for desired consistency
- A pinch of sea salt
- ¼ cup dark chocolate chips (optional, for extra chocolatey goodness)
Instructions
Step 1 — Blend the Base
In a blender or food processor, add:
- 2 cups cottage cheese (or Greek yogurt for a lighter, tangy texture)
- ¼ cup cocoa powder
- 2 scoops chocolate protein powder
- 3 tbsp honey or maple syrup (you can adjust depending on your desired sweetness)
- 1 tsp vanilla extract
- A pinch of sea salt
Blend until everything is smooth and well-combined. The mixture should be thick and creamy, with no lumps from the cottage cheese or yogurt.
Step 2 — Adjust Consistency
Add ¼ cup milk (or more as needed) to adjust the consistency. The goal is to achieve a soft-serve-like texture that can still hold its shape but is smooth and easy to scoop. You may need to blend it a bit longer to fully incorporate the milk.
Step 3 — Add Chocolate Chips (Optional)
If you’re using dark chocolate chips, fold them gently into the mixture by hand or pulse a few times in the blender to distribute them evenly without overmixing.
Step 4 — Freeze the Mixture
Transfer the mixture to an airtight container or a loaf pan. Cover the surface with plastic wrap or parchment paper to prevent ice crystals from forming. Freeze for 4–6 hours (or overnight) until the ice cream is firm.
Step 5 — Serve & Enjoy
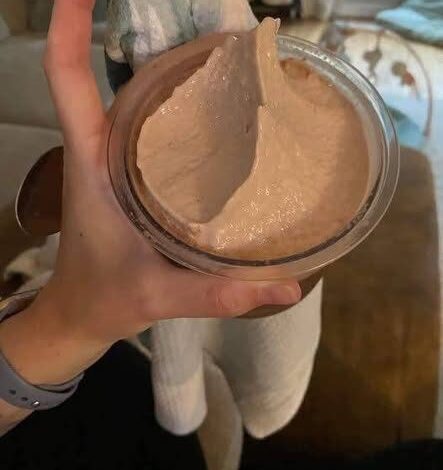
Once the ice cream has fully set, scoop it into bowls or cones and enjoy! The texture will be creamy and rich, with a deep chocolate flavor and a protein boost.
Additional Notes
- Customization: You can easily make this ice cream your own by adding different mix-ins, like crushed nuts, dried fruit, or shredded coconut. Just be sure to add them after blending.
- Dairy-Free Option: To make this dairy-free, substitute the cottage cheese and milk with dairy-free alternatives like almond yogurt and coconut milk.
- Sweetener Adjustments: Feel free to adjust the sweetness based on your personal preference. You can use stevia, monk fruit, or other natural sweeteners to make it sugar-free.
Dietary Info
- High-Protein: Packed with cottage cheese and chocolate protein powder, this ice cream provides a solid amount of protein to fuel your muscles.
- Low-Sugar Option: With the use of honey or maple syrup, you can control the sugar content, making it a low-sugar treat.
- Gluten-Free: This recipe is naturally gluten-free, making it safe for those with gluten sensitivities.
- Low-Carb Option: To reduce carbs, simply use a low-carb sweetener and adjust any additional ingredients as needed
Variations
- Peanut Butter Protein Ice Cream: Add peanut butter to the base for a rich, nutty flavor that pairs beautifully with chocolate.
- Mint Chocolate Chip: Stir in a few drops of mint extract and top with chocolate chips for a refreshing twist.
- Fruit Flavored: Swap out the cocoa powder for pureed strawberries, mango, or blueberries for a fruity version of this protein ice cream.
Storage & Make-Ahead
- Storage: Store any leftover ice cream in an airtight container in the freezer for up to 2 weeks. To prevent freezer burn, place a piece of plastic wrap directly on the surface of the ice cream before sealing the container.
- Make-Ahead Tip: You can make this ice cream up to a week in advance. Just make sure to let it sit at room temperature for a few minutes before scooping if it becomes too hard